When you schedule a Panopto Live Webcast you can create a landing page so that when students view the link from the content area of the unit on Brightspace, they can see details of the session before it begins. It lets participants know they are in the right place at the right time and it’s also a good place to include IT Helpdesk contact details to help those who might experience technical difficulties accessing the webcast.
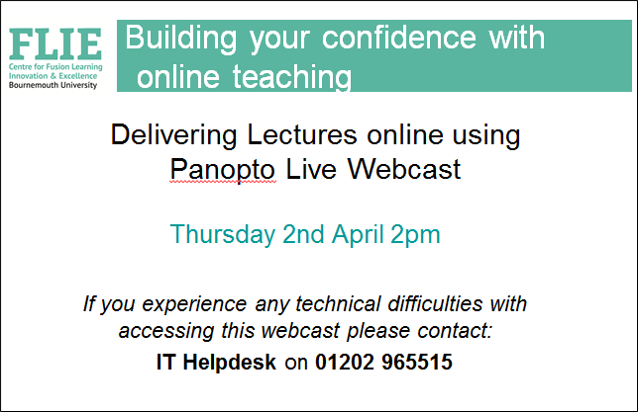
- Create a PowerPoint slide (this could be the first one of your presentation) with the Title, date, time and IT Helpdesk contact details.
Use the Snipping Tool to take a screen shot of the slide.
Once selected, Go to File > Save as and save your slide as a jpeg image.
- From your unit, click on Record with Panopto.
Find your webcast:

Hover over the webcast link and click on Settings.
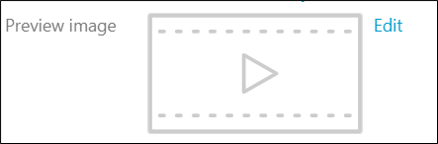
Click on Edit next to Preview Image:
Select Choose File and navigate to your saved image.
Click on Save.
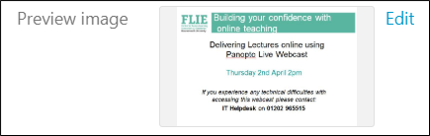
Your slide will now be showing in the Preview image pane:
You can now close the webcast window:
- Open the Brightspace unit and the required module and click ‘Upload/Create’ and select ‘Create a file’, enter the title of the Webcast, then click the first icon on the toolbar (Insert Stuff). Scroll down and click ‘Insert Panopto Video’, select the webcast and scroll down and click ‘Insert’, click ‘Insert’ again and ‘Save and Close’.
Students will now see this view from the webcast link in the Content area of the unit:

For more information on using Panopto recording or webcasts Click Here


